How I Got The Shot: Tarzan & James
March 5th, 2019
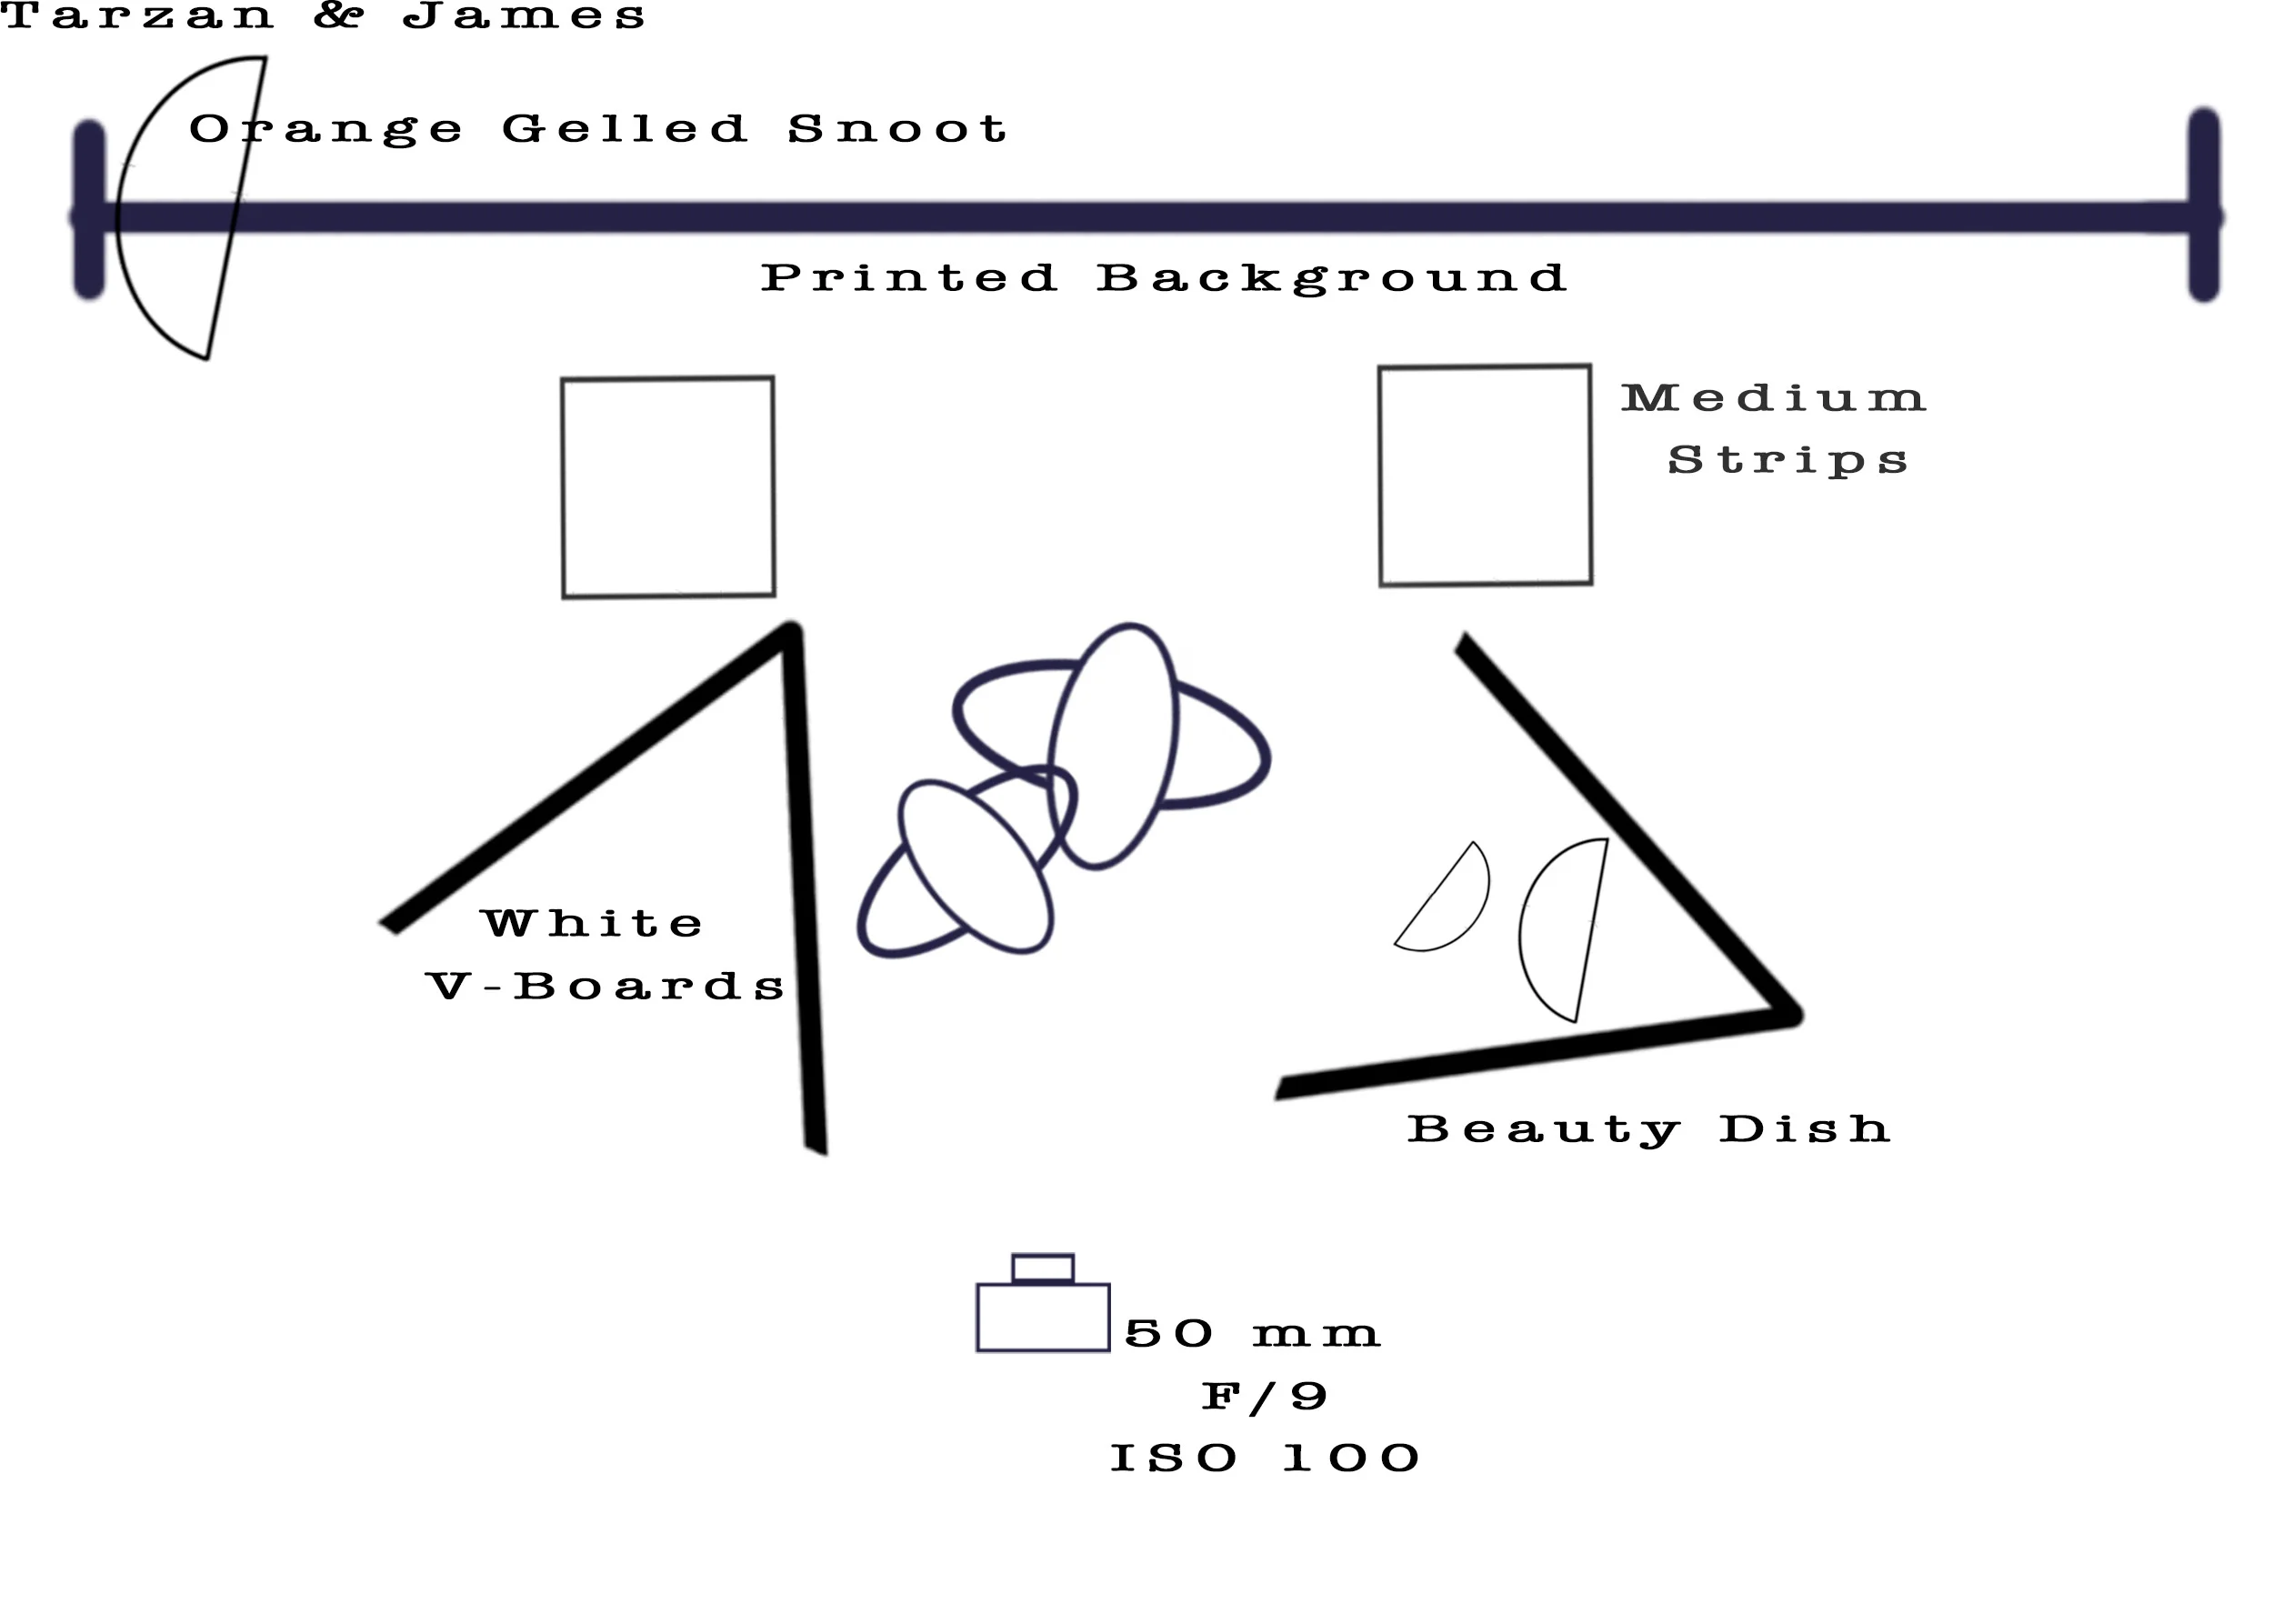
Lighting Schematic for Tarzan & James ©2019 Adrienne Row - Smith / Strast Media
Normally, my favourite images are high contrast with an accent of colour. I like to do larger than life production photographs, however I prefer their technical setups to be minimal. However, I wanted to try my hand at emulating a big production and lighting photograph to just see how far training my eye via the Algonquin Photography Program has gotten me.
The image that I wanted to Emulate was David LaChapelle’s American Jesus: Hold Me, Carry Me Boldly (2009). However, before even going into the studio I had a lot of prep work to do. Firstly, I needed to understand the lighting (as much as I could get through the camera).
Tarzan & James ©2019 Adrienne Row - Smith / Strast Media
Initially, I was under the impression that there was a hair light and kicker in the background that helped give the ‘Jesus’ of the image his glow. However, based on other lighting around the bodies, and after further consultation with others it was decided that the best route would be to use medium strips off to the side and pointing at the subject. Then, I decided to use a beauty dish up high, and a parabolic with a 3 degree grid down below to help create a harder shadow while also still ensuring light filling in on the subjects. Finally, to make sure that the subjects had enough even lighting, I decided to enclose my set with white v – boards. During shooting I realized that the Beauty dish was a little too harsh and hot (meaning that the subjects were having very bright spots landing on them overexposing certain areas) on the subjects – that I decided it would be better to bounce the light back into the white v – board to diffuse it a little bit more. And not to forget, I included an orange gelled snoot shooting through my background, to create the illusion of the sun setting.
Once I had the lighting figured out, I need to go get supplies. I found the greenery that “Tarzan” was sitting on at Michael’s, and then found the leafy flooring (which was actually a wall trellis) at Lowe’s. However, the most challenging part was creating the background. The background was printing on vinyl, after I found a royalty free image online. Once I had all these pieces and lighting together it was time to head to the studio and tie it together.
After shooting with my models (shout out to Lucas & Jesse for being great sports!) I then imported the images into photoshop from Phocus (Hasselblad specific software) and began to put it all together for the final image you see below!
